반응형

종종 ADB 연결 후 파일을 수정하고 싶은데 에디터가 설치되어 있지 않은 안드로이드 장치가 있을 경우 난감하다.

설치가 쉬울텐데 방법을 검색하니 이상한 것들이 많이 나와서 한글로 정리해본다.


보통의 경우 아래와 같이 사용하면 된다.

adb shell
busybox vi


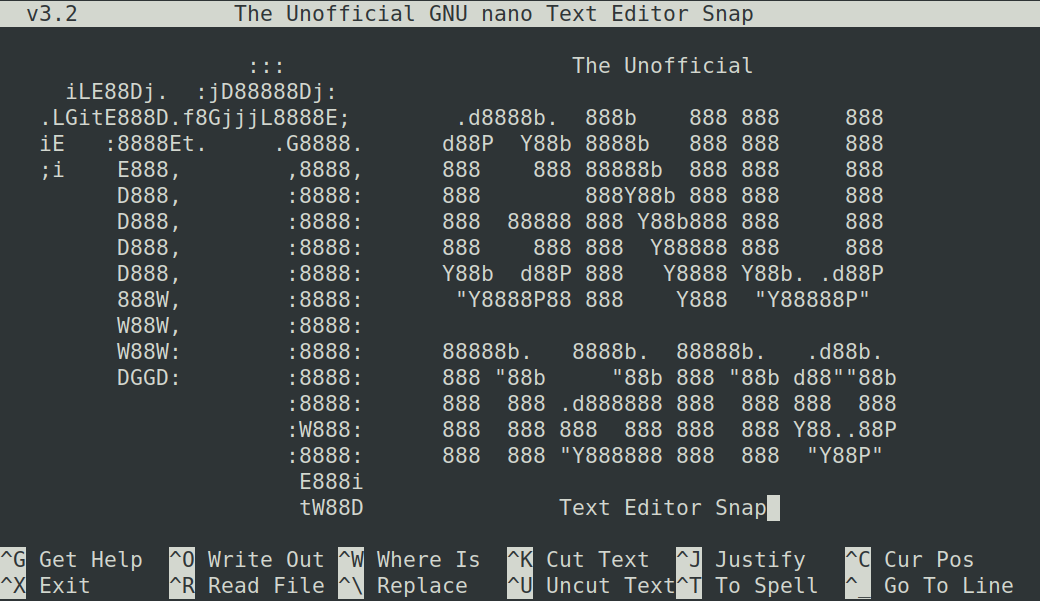
vi가 불편할 경우 nano를 아래와 같이 간단하게 설치하고 사용할 수 있다.

먼저 아래 nano를 받고 압축을 풀어서 윈도우 명령 프롬프트로 압축 해제한 폴더에 가서 아래와 같이 진행하면 된다.

nanoforandroid.zip
0.53MB

이제 adb 로 root 권한으로 접속한 후 아래 명령어로 복사하고 권한주고 시스템 설정을 해주면 된다.

adb push nanoforandroid /mnt/sdcard/Download
adb shell
su
mount -o rw,remount /system
cp /sdcard/Download/nanoforandroid/etc/profile /system/etc
cp -r /sdcard/Download/nanoforandroid/etc/terminfo /system/etc
cp /sdcard/Download/nanoforandroid/xbin/nano /system/xbin
chmod 755 -R /system/etc/terminfo
chmod 755 /system/xbin/nano
chmod 755 /system/etc/profile
export TERMINFO=/system/etc/terminfo;export TERM=linux


다만 환경변수(export)가 자동으로 저장되지 않아서 접속할때마다 마지막줄을 입력해야 한다.


nano editor 사용법은 다양하지만 세개정도만 기억해 주면 됩니다.

  • Ctrl+X  종료
  • Ctrl+O  저장
  • Ctrl+K  현재 행 삭제

더 자세한 내용은 아래 위키 참조해주세요.

https://zetawiki.com/wiki/Nano_%EB%8B%A8%EC%B6%95%ED%82%A4


이상 끝.

반응형
반응형

한국의 인터넷 인프라는 매우 좋아서 무선이건 유선이건 매우 빠른 속도를 자랑하고 있습니다.

유선 서비스는 보통 100Mbps 속도이고 500Mbps 1Gbps 의 기가비트급 서비스도 많이들 사용하고 있습니다.

LTE도 150Mbps 까지 나오기도 하며 5G는 한국에서 이론적으로 988Mbps 까지 가능합니다.

이제 무언가를 다운받는데 걸리는 시간이 문제가 되지 않는거죠.


더 중요한 것은 인터넷 화면을 뿌려주는 장치(핸드폰, PC)의 성능과 데이터를 보냈다 돌아오는 시간(지연시간, ping)이 쾌적함의 차이를 느끼게 해주는 시기가 되었습니다. 핸드폰이나 PC는 돈이 들어서 쉽게 못바꾸지만 지연시간을 줄일 수 있는 쉬운 방법 중 하나가 dns 를 변경하는 방법입니다.


DNS란?

도메인 네임 시스템(Domain Name System, DNS)은 호스트의 도메인 이름을 호스트의 네트워크 주소로 바꾸거나 그 반대의 변환을 수행할 수 있도록 하기 위해 개발되었다.

DNS resolution sequence, wikipedia


우리가 인터넷을 사용할 때 특정 사이트에 접속하고 싶을때 입력하는 주소를 해석해주는 시스템입니다. 컴퓨터에서 통신을 진행할때 각 디바이스는 IP를 할당받는데 이 IP가 숫자의 나열이라서 사람이 기억하기 힘들기 때문에 IP와 영어(또는 한글 등의 언어)로 매칭시켜주는 시스템이죠.


더 자세한 내용을 알고 싶으면 아래와 같은 사이트에서 공부할 수 있습니다.

http://tcpschool.com/webbasic/address


DNS가 왜 중요해?

예를 들어 www.daum.net  에 접속한다고 하면 우리가 이 주소를 dns 서버에 보내서 IP가 뭐냐고 물어보고 답변을 기다려야 합니다. 당연히 dns 서버의 응답이 빠르면 인터넷이 빨라지겠죠?


가장 빠른 DNS는??

사용하는 인터넷 환경에 따라 빠른 dns 서버가 다릅니다. 그렇기 때문에 DNS benchmark 를 통해서 dns를 변경하면 속도가 조금 더 빨라질 수 있는거죠.


자 이제 빠른 dns 서버를 찾아봅시다.


DNS Benchmark

아래 사이트에서 DNS Benchmark를 받아서 실행해봅시다. 실행파일 한개에요. 거기다 프리웨어에요.

https://www.grc.com/dns/benchmark.htm

사이트 들어가서 요 그림을 누르면 받아져요.


실행을 하면 일단 테스트를 진행할 DNS 서버 목록을 자동으로 받아옵니다. (1~2분 소요)


그리고 Run Benchmark 버튼을 누르면 DNS 서버별로 속도 평가를 해줍니다.


대부분의 DNS 서버 속도가 준수하네요. KT(168.126.63.2)와 CloudFlare(1.0.0.1) 서버 속도가 빠르네요.

예전에는 구글 DNS(8.8.8.8)가 빠르다고 했는데 이제 옛말인가 봅니다.

저는 공유기에 개인적으로 설치한 DNS 서버가(192.168.1.1)가 있는데 성능이 생각보다 안좋네요 ^^;

인터넷 회선은 KT 500GiGa 사용중입니다.


이제 가장 빠른 dns로 변경해봐야죠?


윈도우10 DNS 변경

윈도우는 아래와 같이 사용하는 랜카드에서 dns를 변경하면 됩니다.


작업표시줄 시작버튼에 오른쪽을 누르고

네트워크 연결 > 어댑터 옵션 변경 > 사용중인 랜카드 오른쪽 마우스로 선택 > 이더넷 속성 > TCP/IPv4 > 다음 DNS 서버 주소 사용 > 사용하고싶은 DNS 입력


안드로이드 DNS 변경

안드로이드 9(파이) 부터 DNS 를 변경이 시스템에 내장되어 있습니다.

갤럭시 s10e 기준으로 아래 메뉴에 있습니다. 

설정 > 연결 > 기타 연결설정 > 프라이빗 DNS > 프라이빗 DNS 공급자 호스트 이름 


이때 사용되는 프라이빗 DNS 주소는 DNS Server 에서 제공됩니다.

몇개 유명한 DNS Provider host name 아래와 같이 정리하여 공유합니다.

  • Cloudflare: 1dot1dot1dot1.cloudflare-dns.com
  • Google DNS: dns.google
  • Quad9 DNS: dns.quad9.net
  • AdGuard 광고필터 DNS: dns.adguard.com
  • AdGuard 기본 DNS: dns-unfiltered.adguard.com


그 이전 버전의 경우 아래와 같이 앱을 설치해서 사용해야 합니다.

https://nhj12311.tistory.com/279


안드로이드 스마트폰에서 DNS 변경하는 방법

여러가지 사유로 인해서 안드로이드 스마트폰에서 DNS를 변경하실 일이 있으실텐데요. 아마도 현재 DNS로 접속이 안되는 사이트가 있어서 DNS를 변경하고자 하실 겁니다. 이미 한참도 전인 정부에

nhj12311.tistory.com


공유기 DNS 변경

공유기마다 설정이 다릅니다. 사용하는 공유기 설명을 찾아서 읽어보세요~


반응형
반응형

시놀로지 라우터를 위한 스크립트 모음이 있다.

사용을 위해서는 라우터에 usb 나 sdcard 와 같은 메모리가 ext3 format 으로 사용중이어야 한다.


아래 링크에서 확인하면 된다.

https://gitlab.com/Kendek/syno-router-scripts/-/blob/master/README.md#wireguard_installsh


1. 설치

라우터에서 ssh 접속이 가능하도록 한 후

ssh 로 접속한다.

로그인은 root 계정으로 한다. (admin 계정이 아님!! 암호는 admin 계정과 동일)


로그인 후 아래 내용을 입력하면 자동으로 설치 스크립트 창이 뜬다.

sh -c "$(wget -O- goo.gl/Pkyohd)"


WireGuard VPN 설치를 위해서 먼저 사용 할 수 있는 환경을 설치해야 하는데

1번 entware나 2번 ubuntu 아무거나 설치해도 된다.

설치 후 5번 wireguard 를 눌러서 설치하면 된다.


2. 라우터 방화벽 설정

wiregurad 사용을 위해서는 시놀로지 라우터에서 방화벽 설정을 아래와 같이 해주어야 한다.

Necessary firewall rule for connection:

Protocol Source IP Source port Destination IP Destination port Action

UDP All All SRM 51820 Allow

Necessary firewall rule for access to local network:

Protocol Source IP Source port Destination IP Destination port Action

TCP/UDP 10.7.0.0/255.255.255.0 All All All Allow


3. client 용 설정 파일, QR code 확인

다시 스크립트 접속 후 5번 메뉴 wireguard 에 들어가서 client 추가를 하면 자동으로 설정 및 qrcode 생성이 된다.

생성된 설정 파일 및 QR code는 라우터에 저장되며 라우터 file station 또는 다른 방식으로 접근해서 확인하면 된다.


4. VPN client 설정

안드로이드는 구글 스토어에서 wireguard 를 설치하고 위에서 만든 QR코드를 리딩하기만 하면 자동으로 추가된다.

그리고 바로 사용 가능하다.

윈도우의 경우에는 위에서 만든 컨피그 파일을 불러오면 된다.

참조를 위해 아래 링크도 남겨놓는다.


참조할만한 링크

https://golb.hplar.ch/2019/07/wireguard-windows.html


Setting up WireGuard on Windows

A few months ago, I wrote a tutorial on how to install WireGuard, a simple, fast, and modern VPN, on Linux and open a VPN connection from an Android device. Because I work most time on Windows I was also especially interested in connecting my computer to a

golb.hplar.ch

https://serversideup.net/generating-wireguard-qr-codes-for-fast-mobile-deployments/


Generating Wireguard QR codes for fast mobile deployments - Server Side Up

Supporting mobile devices with Wireguard VPN can be dramatically easier by using a QR code. Learn how to generate a Wireguard QR code for your clients in just a few minutes.

serversideup.net

https://serversideup.net/how-to-configure-a-wireguard-ios-client/


How to configure a Wireguard iOS client - Server Side Up

This is a coniutation of my free “mini-course” called Gain Flexibility & Increase Privacy with Wireguard VPN. Start there if you are new to Wireguard. What you’ll achieve We will have our iPhone client connecting to our Wireguard VPN server This is w

serversideup.net

https://serversideup.net/how-to-configure-a-wireguard-android-vpn-client/


How to configure a Wireguard Android VPN Client - Server Side Up

Learn how to easily configure a Wireguard Android client. Using QR codes, I'll show you how you to easily configure a remote device in minutes.

serversideup.net


https://ziwon.github.io/post/wireguard/


WireGuard 설치 및 방화벽 설정 | ziwon.github.io

WireGuard 소개 WireGuard는 임베디드 인터페이스와 슈퍼 컴퓨터를 위한 범용 VPN로, 최첨단 암호화 기술을 사용하며 단순하고 빠르고 현대적인 VPN이다. IPsec보다 더 간단하며 더 빠르고, OpenVPN보다 성�

ziwon.github.io


https://www.wireguard.com/quickstart/


Quick Start - WireGuard

Quick Start You'll first want to make sure you have a decent grasp of the conceptual overview, and then install WireGuard. After that, read onwards here. Side by Side Video Before explaining the actual comands in detail, it may be extremely instructive to

www.wireguard.com


반응형
반응형

ssh로 접속 후 wireguard 설치

repository가 등록되어 있지 않아서 아래와 같이 추가하여 설치하자 

sudo add-apt-repository ppa:wireguard/wireguard


sudo apt install wireguard


서버 공개키 개인키 생성

sudo mkdir -p /etc/wireguard/server; wg genkey | sudo tee /etc/wireguard/server/server.key | wg pubkey | sudo tee /etc/wireguard/server/server.key.pub

서버 공개키 출력


공개키 개인키 재확인

cat /etc/wireguard/server/server.key.pub
cat /etc/wireguard/server/server.key


서버 설정파일 제작 

sudo nano /etc/wireguard/wg0.conf


[Interface]
Address = 192.168.2.1/32
PrivateKey = Server_private_key
ListenPort = 1194

[Peer]
PublicKey = Client_1_public_key
AllowedIPs = 192.168.2.2/32
  • Address: VPN 접속시 서버 IP 주소
  • PrivateKey: 서버의 개인키
  • ListenPort: 사용 포트 (방화벽 에서 열어줘야함, 공유기 사용시 포트포워딩 필요)
  • PublicKey: 접속에 사용하는 client(PC나 모바일폰)의 PublicKey
  • AllowedIPs: client 할당 IP


모바일용 QR 코드 제작을 위한 설정


qrencode 설치

sudo apt install qrencode


QR코드용 공개키 개인키 생성 후 확인

sudo mkdir -p /etc/wireguard/clients; wg genkey | sudo tee /etc/wireguard/clients/mobile.key | wg pubkey | sudo tee /etc/wireguard/clients/mobile.key.pub
cat /etc/wireguard/clients/mobile.key

위쪽 박스: 공개키

아래쪽 박스: 개인키


QR코드용 설정파일 제작

sudo nano /etc/wireguard/clients/mobile.conf
[Interface]
PrivateKey = Mobile_Private_key
Address = 192.168.2.3/24
DNS = 1.1.1.1, 1.0.0.1

[Peer]
PublicKey = YOUR_SERVER_PUBLIC_KEY
AllowedIPs = 0.0.0.0/0
Endpoint = YOUR_SERVER_WAN_IP:1194
  • Endpoint: 서버IP (또는 DDNS 주소 사용 가능)


서버 설정파일에 Peer 추가

sudo nano /etc/wireguard/wg0.conf
[Interface]
Address = 192.168.2.1/32
PrivateKey = Server_private_key
ListenPort = 1194

[Peer]
PublicKey = Client_1_public_key
AllowedIPs = 192.168.2.2/32

[Peer]
PublicKey = Mobile_public_key
AllowedIPs = 192.168.2.3/32


QR 코드 생성

qrencode -t ansiutf8 < /etc/wireguard/clients/mobile.conf


Wireguard 실행

wg-quick up wg0


이제 생성된 QR 코드를 소중하게 잘 보관하고 wireguard android 앱에서 QR스캔하면 접속 가능!


Wireguard 가 실행되어 있을 경우에는 아래와 같이 재시작 필요

wg-quick down wg0 && wg-quick up wg0


시스템 재시작시 자동 실행 등록

sudo systemctl enable wg-quick@wg0

Synology NAS의 경우 제어판-작업스케줄러에 시작시 아래와 같이 실행하도록 설정

sleep 60
wg-quick up wg0
sleep 5
wg-quick down wg0
sleep 5
wg-quick up wg0


윈도우에서는 아래와 같이 설정되어야 함 참조하여 윈도우 client 셋팅하고 서버 설정파일에 키를 잘 넣어주자.


이상 끝


참조할만한 링크

https://golb.hplar.ch/2019/07/wireguard-windows.html


Setting up WireGuard on Windows

A few months ago, I wrote a tutorial on how to install WireGuard, a simple, fast, and modern VPN, on Linux and open a VPN connection from an Android device. Because I work most time on Windows I was also especially interested in connecting my computer to a

golb.hplar.ch

https://serversideup.net/generating-wireguard-qr-codes-for-fast-mobile-deployments/


Generating Wireguard QR codes for fast mobile deployments - Server Side Up

Supporting mobile devices with Wireguard VPN can be dramatically easier by using a QR code. Learn how to generate a Wireguard QR code for your clients in just a few minutes.

serversideup.net

https://serversideup.net/how-to-configure-a-wireguard-ios-client/


How to configure a Wireguard iOS client - Server Side Up

This is a coniutation of my free “mini-course” called Gain Flexibility & Increase Privacy with Wireguard VPN. Start there if you are new to Wireguard. What you’ll achieve We will have our iPhone client connecting to our Wireguard VPN server This is w

serversideup.net

https://serversideup.net/how-to-configure-a-wireguard-android-vpn-client/


How to configure a Wireguard Android VPN Client - Server Side Up

Learn how to easily configure a Wireguard Android client. Using QR codes, I'll show you how you to easily configure a remote device in minutes.

serversideup.net


https://ziwon.github.io/post/wireguard/


WireGuard 설치 및 방화벽 설정 | ziwon.github.io

WireGuard 소개 WireGuard는 임베디드 인터페이스와 슈퍼 컴퓨터를 위한 범용 VPN로, 최첨단 암호화 기술을 사용하며 단순하고 빠르고 현대적인 VPN이다. IPsec보다 더 간단하며 더 빠르고, OpenVPN보다 성�

ziwon.github.io


https://www.wireguard.com/quickstart/


Quick Start - WireGuard

Quick Start You'll first want to make sure you have a decent grasp of the conceptual overview, and then install WireGuard. After that, read onwards here. Side by Side Video Before explaining the actual comands in detail, it may be extremely instructive to

www.wireguard.com


사족. 서버와 라우터의 방화벽 설정을 잘 해야 한다. 해당 포트들 오픈이 안되있으면 연결이 안됨

반응형

+ Recent posts